
If users land on your website but go back to the previous website or search engine within a few seconds, you may need to make a few improvements. In a study, 88% of customers stated that they didn’t prefer returning to sites that aren’t user-friendly, which makes a user interface an important factor impacting user experience.
This statistic shows how important it is to perform usability testing before launching your product or website. If you are searching for how to conduct usability testing for a website, application, or software, we have got you covered.
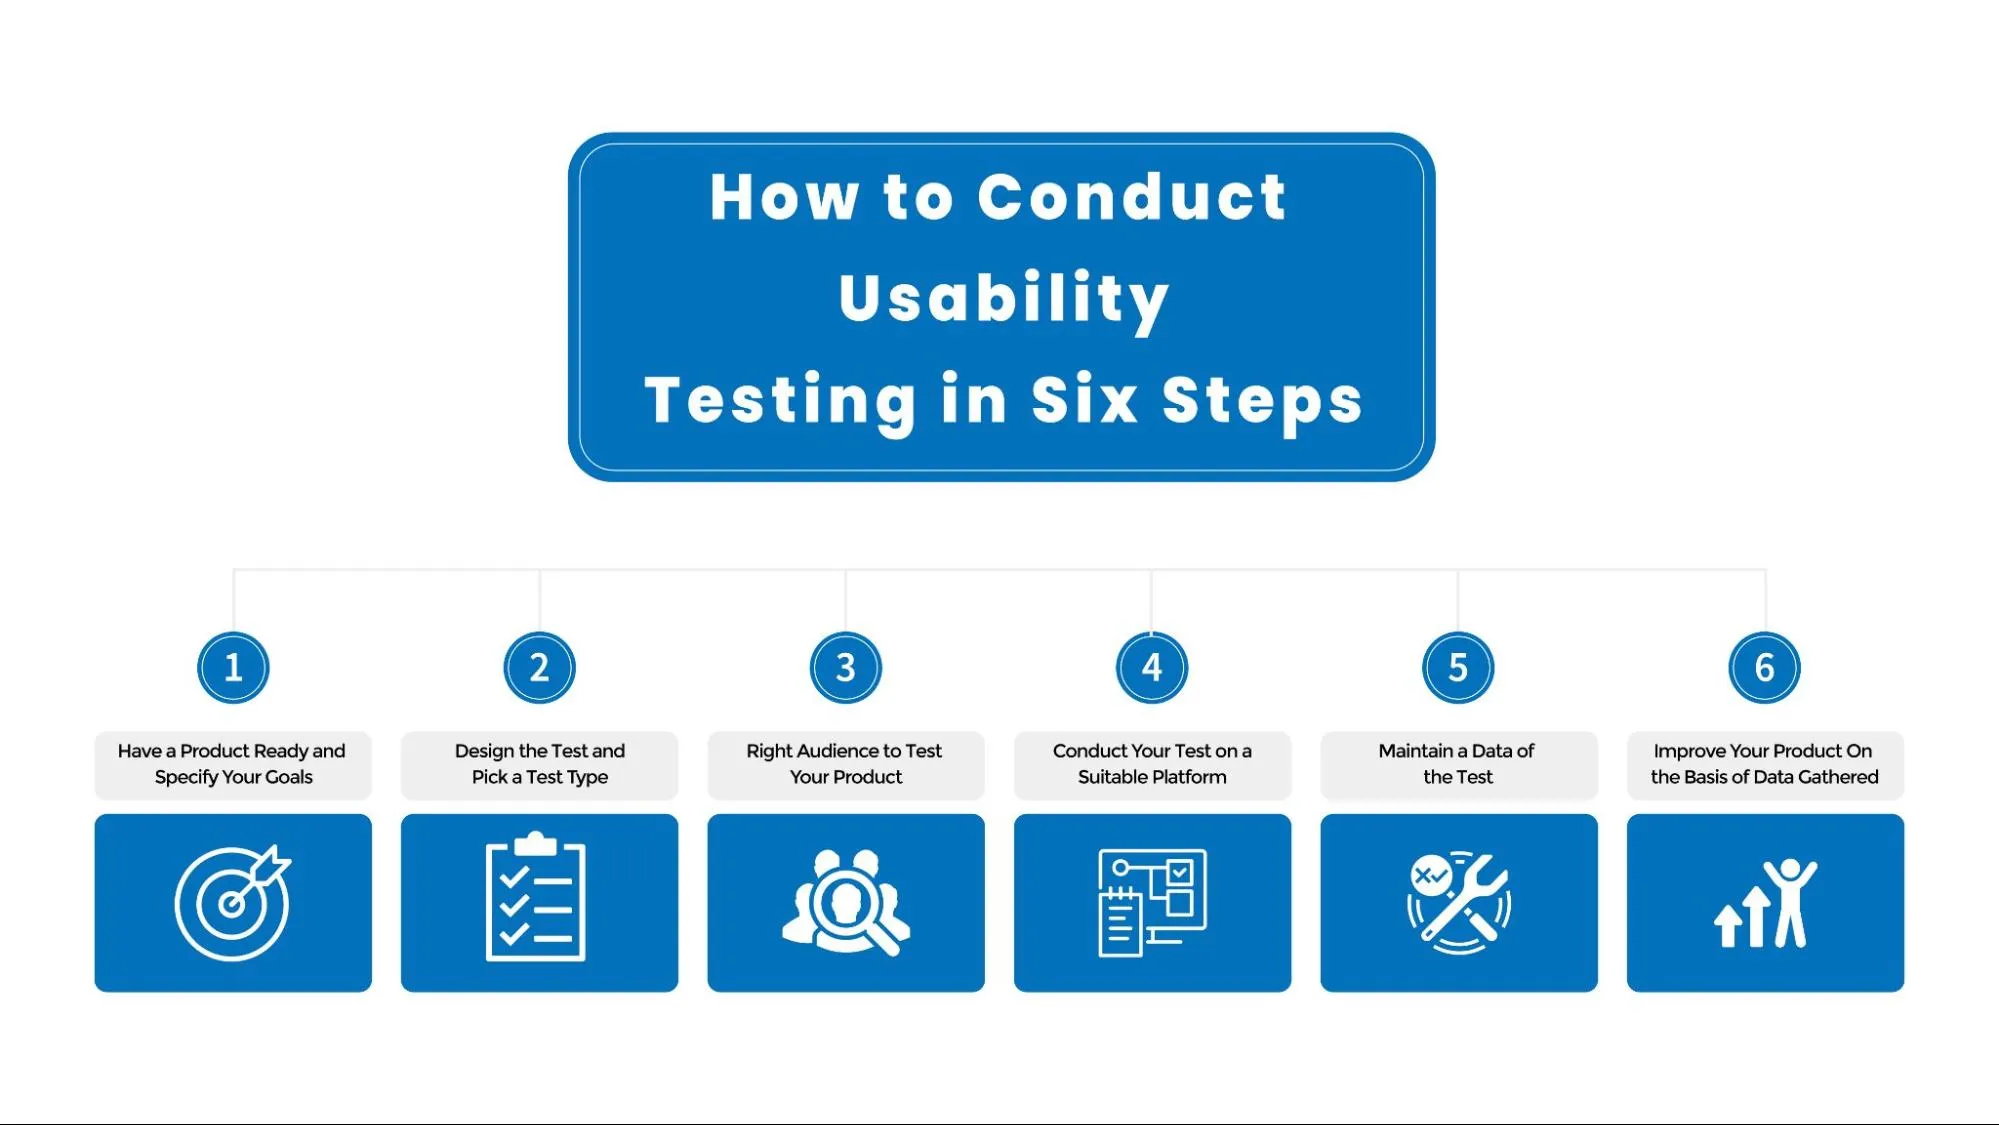
Here are the six simple steps you can follow to make your interface smooth, retain website visitors, and generate higher revenue.
6 Simple Steps for Conducting Usability Testing
Step 1. Have a Product Ready and Specify Your Goals

To get started with the usability testing process, you should have the product ready. Your product can be anything between software, a website, or an application. Sometimes, usability testing is conducted when the final product is ready. Whereas some businesses prefer conducting initial tests on the prototype.
Be certain if you want to test a prototype or the final product. We’d suggest testing at the prototype stage since it is easier to address major issues at the start.
Along with choosing the product stage for testing, you should also have a testing goal in mind. Make up your mind if you want to test its design, its smooth use, or its navigation.
Testing with a set goal will get you the results you’re looking for and help you make necessary improvements. Otherwise, driving a reliable result and creating a plan for improvement can be challenging.
For smooth and efficient testing, you can also outsource a QA engineer. In fact, you can get in touch with VinnCorp’s talented QA engineers, who have years of experience making software products user-friendly.
Step 2. Design the Test and Pick a Test Type

The next step of usability testing is designing your test. It’s important to have a flawless test design to generate error-free results.
Your test type can be divided into two sub-categories:
- Open Ended Tasks
- Specific Task
Open Ended Tasks
Open-ended tasks are carried out to identify the most common interest of your targeted audience. It helps you work on primary issues that are keeping users from using your product effortlessly.
Specific Tasks
As the name implies, specific tasks intend to generate results for a particular feature or functionality. Usually, these types of tasks can address issues when a product has multiple functionalities or is highly complex.
Pick a test type from both of these according to your scenario and product type to conduct successful user testing.
Step 3. Test Your Product With the Right Audience

Once you have set the goal and chosen a test type, the next step is to find the right test audience. This step is the most crucial one and takes a hefty amount of time. With a product live, you might not have to work hard in this stage and can perform tests on your existing customers. However, if you do not have an audience, you might have to use your social channels.
Ask your friends or family members to be a participant if their interest aligns with the product you are about to launch. Be sure to remind them that you want unbiased results to acquire the right knowledge and flaws of your product.
If achieving unbiased results is not possible, try to avoid fellow employees or family members, as they can affect the data. Since a well-aware audience comes with pre-convinced thoughts and experience, they might also reflect and criticize your product on the basis of their prior experience. Recruiting an audience unfamiliar with your product can be highly beneficial in this case.
Additionally, take account of your audience’s “gender, age, location, education, profession, income, or characteristics” to evaluate the results better.
Step 4. Conduct Your Test on a Suitable Platform

Depending on the type of your product, you can conduct tests in two ways:
- Remote
- In-person
Remote
For remote testing, you can use platforms like Skype or Zoom. Observe the expressions of your test participants if it’s live to get a better idea of their impression of a specific feature.
While conducting the test, you can also tell your tester to imagine a product and its specific feature’s impact on their life. This will help them make a better verdict on it.
In-Person
Request your test participant to evaluate how smoothly your product responds and operates and add a personal touch when dealing with participants personally. This will also make your tester comfortable and distraction-free.
In fact, you should always pick an isolated place to test with no pets, family members, or employees around. One good example is the Guerilla method, where you can simply meet the tester in cafes or public places to conduct tests.
Practice asking the questions beforehand to focus on the subject’s answers on the spot. You can also record the test conversation with the consent of the candidate. This will keep you free from making notes.
Mention that the recording will be confidential and you will be reviewing it for test analysis. Later, when you revisit the recording, you’ll be able to focus on points that might have gone unnoticed earlier during the test.
Step 5. Maintain Data of the Test

Maintaining data is the next step once you are done with the test. In this stage, you distill, summarize, and organize data to get it in good shape and make it easier to study.
The data gathered can be in the following ways:
- Audio recordings
- Video recordings
- Spreadsheet with notes
- Survey and feedback form
- Calculated success rate
- Calculated error rate percentage
Make a testing report with the above-mentioned details. You can also use a Powerpoint presentation to reflect all the data and include the background, testing method, test result, recommendations, and summary in the report.
This stage needs complete focus and proofreading of the report to ensure the results are reliable. Remember, the goal is to make amendments and improvements on the basis of the data, so never rush while making the report.
Step 6. Improve Your Product On the Basis of Data Gathered

This is the final stage of usability testing. Here, you will address bugs and fix them according to the reports generated to give your users a smoother interface and experience.
Draw a possible solution for every error encountered during the test. It would be best to have multiple solutions to solve a specific issue. This way, you can go with option B if option A doesn’t improve your product’s issue.
Collaborate with your designer and developer to resolve these issues. Share details regarding the bug found, and issues users have faced. They will work on it to make a responsive and user-friendly product.
Conclusion
To help you make your product’s interface smooth, this article discussed how to conduct usability testing in six simple steps.
Usability testing is a straightforward method to detect bugs and improve performance. To perform this test, you have to specify the goals of your test, design and pick a test type, recruit an audience to participate and take their opinion, maintain data collected during the test, and improve your product at last.
Once you carry out this test and remove the errors, you are bound to see increased engagement and conversion on your website.