Here we have the latest updates on technology and best practices for businesses and enterprises. Explore the practical tips and ideas to gear up your business.
Projections indicate that consumer app spending will reach a staggering $270 billion by the year 2025. This surge in spending reflects the growing number and influence [...]
Every second of delay in webpage loading decreases your conversion by 7%. This makes it crucial to have a website with lightning-fast speed and user experience [...]
Making informed choices about the technology stack is crucial for the success of your project. One such powerful and versatile stack is MERN, an acronym for [...]
In a rapidly evolving digital landscape, having a mobile app has become almost imperative for businesses aiming to stay competitive and relevant. However, determining the right [...]
Front-end development is a critical part of web development that focuses on creating the user interface and user experience of a website or web application. It [...]
Scaling a business is what every business owner aims for. As your business grows, you’ll need to adapt and expand your workforce to meet the increasing [...]
In today’s rapidly evolving digital landscape, businesses face immense pressure to stay ahead of the curve and deliver high-quality IT projects on time. However, finding and [...]
According to Next Move Strategy, the AI market size is projected to experience a staggering twentyfold growth by 2030. With an estimated value of nearly 100 [...]
In today’s world, digital marketing has revolutionized how a customer engages with a business. They don’t need to go to stores to make a purchase. Instead, [...]
In the digital landscape of machine learning, the quality and quantity of data play a significant role in determining the performance of models. That’s where data [...]
In today’s fast-paced and ever-changing business environment, traditional project management approaches often struggle to keep up with the dynamic demands of projects. In response to this, [...]
97% of people explore a local brand through search engines. That said, local SEO serves as the backbone of your business expansion. Although local SEO brings [...]
In the digital age, online reviews wield unparalleled influence, with a staggering 98% of individuals relying on them to shape decisions about local businesses. This undeniable [...]
Search engine rankings are influenced by over 200 factors. Considering this, making the decision of DIY SEO vs. hiring experts can be pivotal for your business. [...]
Ranking on the first page is directly influenced by your Search Engine Optimization (SEO) efforts. This technique not only distributes 95% of the online traffic but [...]
Establishing a strong online presence is paramount for businesses looking to thrive. For RingCentral, a leading communication and collaboration solutions provider, this realization led to a [...]
Exide, a prominent manufacturer of lead-acid electric storage batteries, has enjoyed a storied history since its establishment in 1953. The company has consistently ranked among the [...]
The future of IoT Edge Computing is poised for remarkable transformation. Forecasts indicate that by 2030, the world will witness an astounding surge in consumer-edge-enabled IoT [...]
Information Technology (IT) and Artificial Intelligence (AI) are integral to our daily lives. They have far-reaching impacts on industries, businesses, and society. But what exactly sets [...]
The advancement in technology due to Machine Learning and Artificial Intelligence is evident. From small to established, 65% of companies say that Machine Learning has proved [...]
Virtual reality (VR) has enhanced the experience and captured the imagination of millions, transporting them to new digital worlds. Getting a live transmission of war walking [...]
Artificial Intelligence (AI) is capturing the world at a fast pace. From manufacturing to the job market, industries are highly affected by its advancement. In this [...]
For years, the term invention has been interchangeably used with innovation. This is probably due to their similarity in spelling and familiar usage. However, invention vs [...]
Navigating the ever-changing world of business, companies frequently encounter challenges that demand specialized skills for particular projects. Yet, keeping a full-time staff for every skill needed [...]
Teamwork and collaboration stand as the pillars of a company’s success, with a resounding 75% of staff emphasizing their crucial role. Nowhere is this synergy more [...]
As of 2022, Java is the second most popular language for software development, with 43.07% usage. This indicates that Java’s demand is growing rapidly and is [...]
According to a recent survey, the usage of Java is climbing worldwide. 49% of developers in the world reported using Java for building websites and web [...]
Java has a thriving ecosystem filled with an array of tools and libraries. It empowers you to create robust, efficient, and scalable applications. In this article, [...]
A slow-performing web app and applications adversely affect your business reputation. It keeps the users from trusting you and buying your products or services. This makes [...]
In the dynamic world of mobile app development, Android developers play a crucial role in creating innovative and user-friendly applications for the ever-expanding Android ecosystem. Whether [...]
It has been found that a whopping 91% of iOS apps and 95% of Android apps encounter security vulnerabilities. These numbers highlight a crucial need for [...]
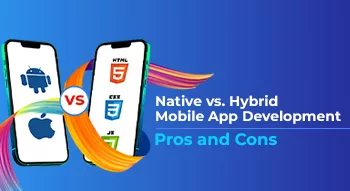
Choosing between Native vs. Hybrid Mobile App Development is challenging for multiple reasons. Recent stats highlight a significant cost difference of almost 30% between the two. [...]
According to job market insights from Indeed, React.js has emerged as the second most sought-after programming skill in 2021, experiencing a remarkable 33% surge in demand [...]
The global market for mobile apps is on a powerful trajectory. Experts predict it could hit a whopping $756 billion by 2027, growing at an impressive [...]
Were you aware that 88% of consumers prioritize authenticity when choosing a brand to purchase from? This means that it’s the most crucial factor for them. [...]
Are you a content writer experiencing writer’s block or a business owner looking for tools to produce high-quality marketing content? Well, whatever the case is if [...]
In today’s competitive business landscape, project managers seek methodologies that can maximize efficiency and deliver value to stakeholders promptly. One such methodology that has gained immense [...]
The advancement in technology demands efficient and effective work processes. The more your workflows are convenient, and on the right track, the more your business grows. [...]
Project management is the backbone of successful ventures in today’s fast-paced and competitive world. Whether you are leading a small team or overseeing a large-scale project, [...]
In search of a top-notch design and development partner to help you build the latest technologies? Here at VinnCorp, we’re dedicated to providing world-class solutions to [...]
A survey report shows that 56% of Principal Software Engineers prefer working at a public company. While 42% of Principal Software Engineers reflect their interest in [...]